Banana Raspberry “Ice Cream”
In our effort (Will has been super supportive by doing the “no wheat” thing with me! What a great husband I have!) to completely cut out wheat from our diets, I’ve also cut out processed sugar. Most things that have sugar also have wheat, but I realize that this is about more than just cutting out the wheat and finding ways around it, this whole “no wheat” thing is about getting healthy and clearing my body of the wheat (did you know that our bodies cannot properly break down the hybridized wheat we now eat? It takes our bodies approximately 6 months to clear the wheat out of our bodies! Yikes!). Over the past several months since we began this process, I’ve come to understand that it’s not just changing the foods that I place in my shopping cart, it’s also changing the way I think about food and how that food will help or hurt my body. Sugar is one of those things that makes my tastebuds happy but does not improve my health or add any nutritional value. So, instead of reaching for the Ben & Jerry’s (which I love), instead I’ve found an alternative for those ice cream cravings, especially on those hot summer days.
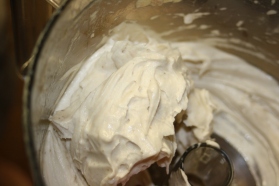
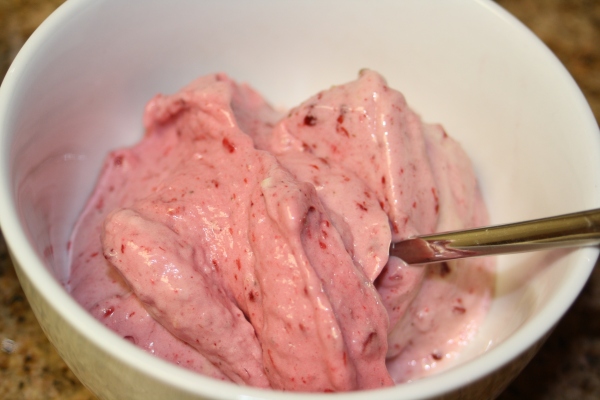
A friend of mine recently told me that you can make ice cream from frozen bananas. I admit I was extremely skeptical, but I decided to give it a try any way. If you leave the frozen bananas in the food processor long enough, eventually, it will soften and take on the texture of a soft ice cream. Will and I have added frozen berries to the creamed bananas to give it additional flavor. Our favorite is a raspberry-banana mixture. Will wants to try adding some peanut butter or cocoa powder. We haven’t tried it yet, but feel free to give it a whirl–just let me know how it turns out! These could probably also be frozen into popsicles. I hope you enjoy this healthy alternative for something cold and sweet!
Banana-Raspberry “Ice Cream”
Ingredients:
3 large bananas, sliced into quarter-sized pieces
3/4 cup frozen raspberries
Directions:
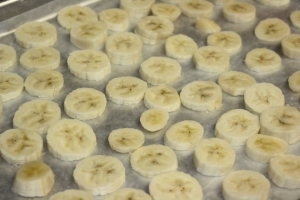
Place cut bananas on a wax-paper lined cookie sheet. Set cookie sheet in freezer until bananas are frozen (approximately 40 minutes). Remove bananas from cookie sheet and put into food processor. Cover, and run food processor until bananas begin to cream and stick together (approximately 4-5 minutes). Add frozen raspberries (or other frozen fruit), and mix until just combined. Serve and enjoy!
White Polenta with Sausage and Fresh Mozzarella
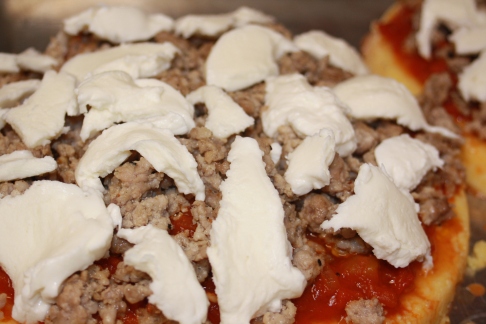
Each month I await eagerly for my copy of La Cucina Italiana magazine. It’s one of the few magazines I still subscribe to, even though I realize that I can find most of their content online. When the latest issue arrives, I like to sit out on our deck (as long as it’s nice and warm!) and read through every article and recipe. It ends up being quite a long break from work or whatever else I have going on that day, but it becomes a mini trip to Italy for that afternoon. I’ve also started receiving their “Recipe of the Week” emails, which are fun for those weeks in between issues. Several months ago, one of their Recipe of the Week emails featured a polenta recipe. Since it was still a little chilly out, polenta seemed like the perfect evening meal. With the tomato sauce, cheese, and sausage, this recipe bears a slight resemblance to pizza, but that’s about where the similarities end. The polenta has a denser texture, but highlights the cheese and sausage really well. This is a great recipe for those of us who crave pizza but can’t run over to Round Table for a slice. I hope you enjoy it!
White Polenta with Sausage and Fresh Mozzarella
Courtesy of La Cucina Italiana
Ingredients:
Unsalted butter (for greasing pans)
4 cups water
4 Tablespoons olive oil
2 bay leaves
Fine sea salt
1-1/2 cups coarse white polenta
1/4 cup finely chopped onion
1 garlic clove, finely chopped
1 (14-ounce) can whole peeled tomatoes in juice (preferably San Marzano)
1-1/2 cups dry white wine
1/2 pound pork sausages
1/2 teaspoon finely chopped thyme
4 ounces fresh mozzarella, cut into 1/4-inch thick slices
Directions:
Grease two 8-inch round cake pans with butter.
In a large saucepan, combine water, 2 Tablespoons oil, bay leaves, and 3/4 teaspoon salt; bring to a boil. Slowly add polenta in a thin stream, whisking; reduce heat to medium and cook, whisking constantly for 2 minutes. Reduce heat to low and cook, stirring often with a wooden spoon, until polenta is thickened and tender, about 40 minutes. Remove and discard bay leaves.
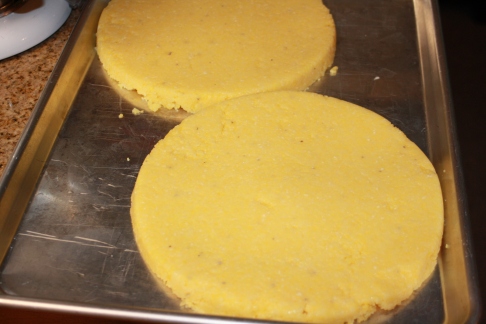
Transfer polenta to prepared pans, spreading evenly with a rubber spatula. Let polenta cool completely in pans on a wire rack.
In a large saucepan, heat remaining 2 Tablespoons oil over medium heat. Add onion and cook for 2 minutes. Add garlic, reduce heat to medium-low, and cook, stirring occasionally, until onions are softened, about 10 minutes. Add tomatoes and their juices; stir and break up tomatoes with a wooden spoon. Add wine, whole sausages, thyme, and 1/2 teaspoon salt. Bring sauce to gentle simmer and cook, uncovered, stirring occasionally, until reduced to 1-1/2 cups (30 to 40 minutes). Remove from heat.
Heat oven to 400 degrees with rack in middle. Line a baking sheet with parchment paper. Remove sausage from sauce and cut into 1/2-inch thick rounds.
Turn out polenta rounds onto prepared baking sheet. Top with sauce, spreading sauce to 1/2 inch from edges of polenta. Arrange sausage and cheese on top. Bake until cheese is melted and just beginning to brown, about 10 minutes. Serve warm, with a drizzle of oil and a sprinkle of pepper. Serve and enjoy!
Certified Yummly
I have exciting news! My Spinach, Potato, Bacon, and Goat Cheese Frittata was recently featured on yummly.com’s blog posting about “Breakfast foods made better with bacon.” Check it out here!
In other news, I realized that it’s been several months (yikes!) since my last post. In the months that I’ve been absent from Tomatoes and Basil, we’ve discovered I have a wheat intolerance. I seriously almost cried in the doctor’s office when I thought of all the delicious bowls of pasta that he was asking me to stay away from. Needless to say, this has created a challenge for finding yummy foods that I can eat without causing a stomach ache (although, I suppose the stomach ache could be worth it for just the right dish!). I’ve taken my time away from the blog to try new recipes and find delicious dishes to share with you. Don’t worry, I’m not going completely gluten-free on you; however, you will notice that I will be posting a combination of recipes–some that are wheat-free and some that aren’t (for those of you who have systems that can handle the wheat). Look for some new recipes to come soon!
Flavorful Fridays: Ricciarelli
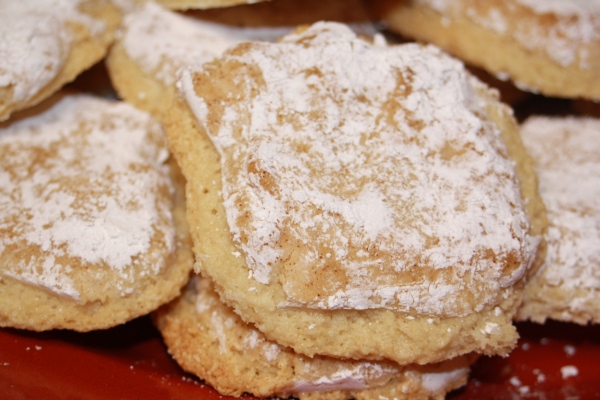
A couple years ago, my parents went to Italy for the wedding of my cousin Stefano. While they were there, they ate amazing food (of course!), but my mom came home raving about a cookie they had eaten that she thought was amazing! These cookies are called Ricciarelli; they are a diamond-shaped almond cookie with a dusting of powdered sugar. Somehow she got her hands on the recipe and passed it along to me. I had the emailed recipe sitting in my inbox for over a year before attempting to bake these. After finally making my first batch, I was disappointed that it had taken me so long to make these. I had missed out on lots of opportunities to make and enjoy these delightful little treats.
These cookies are surprisingly light in texture but extremely rich in flavor. The ricciarelli are soft (how I think a cookie should be) with a slightly chewy center. Note that although they should be diamond shape (and mine were before going into the oven), they will rise a little, so they may turn out to be more rounded than diamond. They are, however, delicious on their own or with berries. Will also added a dollop of homemade whipped cream on top of a couple ricciarelli he ate. We are definitely making these a staple in our home. I hope you enjoy them as well.
Ricciarelli (Sienese Almond Cookies)
Ingredients:
2 cups almond flour or almond meal (you may need an additional cup of almond flour if your dough is soft)
2 cups powdered sugar (more for icing sugar)
1/2 teaspoon baking powder
2 tablespoon flour
2 large egg whites
1 tsp almond extract (add more for a stronger flavor)
1 cup extra powdered sugar for rolling the cookies before baking
Directions:
Preheat oven to 350 degrees.
Place almond flour in a large bowl. Add the powdered sugar. Combine the baking powder with the flour and fold in.
Beat the egg whites until stiff and mix into the almond mixture. Add the almond extract and blend until you have a soft paste.
Place some powdered sugar on a clean, dry surface. Form one tablespoon of dough into a small ball, roll in the sugar, and then form the traditional diamond shape, flattening the cookie with the palm of your hand.
Place the cookies on a baking sheet covered with baking paper or a silpat. Bake for 10-12 minutes until lightly golden. Cooking them at a lower temperature for a longer time will make a softer cookie. Serve and enjoy!
Dark Chocolate-Raspberry Cream Tartlets
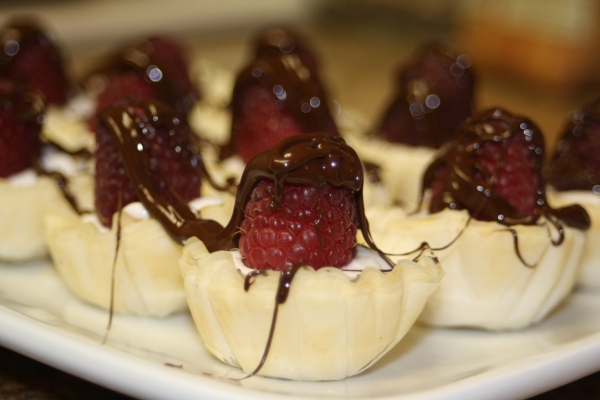
Will’s Valentine’s Day dessert was a little less involved this year than in previous years. We ended up spending our Valentine’s Day night serving dinner to low-income families. After serving dinner and cleaning up, we picked up dinner at Chili’s and ate a low-key dinner on the couch. Nothing terribly fancy, but I felt I needed to do something sweet and homemade for him, in spite of our nontraditional Valentine’s Day. I found this recipe in Life: Beautiful, a Christian lifestyle magazine, and since we both love chocolate and raspberry, it seemed like the perfect Valentine’s dessert. We will definitely be making this one on a regular basis, but be warned: they go fast!
Dark Chocolate-Raspberry Cream Tartlets
Ingredients:
1 oz. dark chocolate
1 package pre-baked mini phyllo shells (approx. 12)
2 Tablespoons mascarpone cheese, softened
1/3 cup low-fat raspberry yogurt
Fresh raspberries
Additional dark chocolate, for garnish
Directions:
In a small microwave-safe bowl, melt 1 ounce dark chocolate on high power in microwave, stirring every 20 seconds until melted. Spoon approximately 1/2 teaspoon chocolate in each phyllo shell. Freeze for 5 to 10 minutes to harden chocolate.
In a small bowl, stir together mascarpone cheese and raspberry yogurt until well combined. Spoon mascarpone mixture into phyllo shells. Place a raspberry in each shell.
Melt additional dark chocolate to drizzle over raspberries. Serve and enjoy!
Salsa Di Parmigiano (“Parm Dip”)
Did my tease about a Michael Chiarello dip recipe entice you back? I hope so!
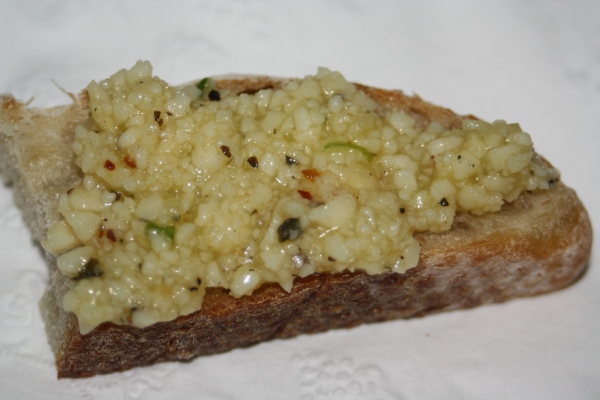
A year and a half ago, Will and I spent a couple days in Napa celebrating our anniversary. We wine tasted and ate our way through the days we were there. Seriously, we had more places that we wanted to eat at than days and meals that we were going to be in town! Remarkably, we were able to get a last minute reservation at Michael Chiarello’s Yountville restaurant Bottega. My parents have raved about this place, so we knew if we could get in, it would be the perfect anniversary evening meal. We were not disappointed! After being seated, the wait staff brought the most amazing Parmesan cheese dip and bread. We were so distracted by this amazing dip that the waiter had to come back several times before we finally looked at the menu and decided on entrees. In all reality, we could have made an entire meal out of the bread and “Parm dip” as Michael calls it. We didn’t, and the rest of the meal was just as wonderful. But, the dip was really the stand-out item from our meal, so when we got home, we tried to recreate it, based on the flavors and ingredients we could pick out. Unfortunately, at the time, our attempts fell far short of the real version, so you can imagine my delight when we found the recipe!
This is by far our favorite dip, and one that, if you ask us to bring an appetizer, this will probably be it. The flavors of the Parmesan and Asiago with a slight hint of heat from the red pepper flakes, pepper, and garlic work so well together. The nice thing about this dip is that it can go on anything–bread, veggies, crackers; I’ve even thought about spreading this over cooked chicken. This recipe makes a lot, which is perfect for sharing, or bringing as a hostess gift. I hope you enjoy it as much as we do.
Salsa Di Parmigiano (“Parm Dip”)
Courtesy of Michael Chiarello
Ingredients:
½ pound Parmesan cheese, not too dry
½ pound Asiago cheese, not too dry
2 tablespoons chopped green onion
2 teaspoons minced garlic
2 teaspoons dried oregano
1 teaspoon freshly ground black pepper
1 teaspoon red pepper flakes
1 ½ cups extra virgin olive oil
Directions:
Remove any rind from the cheeses and chop the cheeses into rough 1-inch chunks. Pulse the cheeses in a food processor until reduced to the size of a fine pea gravel. Transfer the cheese to a bowl and stir in the green onion and garlic. Add the oregano, rubbing between your fingers to release it’s fragrance. Add the black pepper, red pepper flakes, and olive oil. Stir well. Cover and let stand at room temperature at least 4 hours before serving.
Butternut Squash and Fontina Val d’Aosta Risotto
Have you missed me? Or, perhaps the better question is have you missed having some new recipes from Tomatoes and Basil to try?
I apologize for my several-month hiatus. Life this fall was unexpected with work being unusually stressful and hectic, my sister living with us while taking prerequisite nursing classes, my grandmother passing away, several trips to see family, and then, of course, the holidays. I loved having my sister so close–being able to try new recipes with her, sitting and watching girly movies, and just hanging out together. Spending time with my sister and family was a much higher priority (and let’s be honest, way more fun!) than sitting in front of my computer screen after a long day of work and meeting deadlines to write eloquently and persuasively about a delicious and tempting new recipe you have to try. However, with the holidays and crazy deadlines behind me and a new year full of potential ahead, I’m ready to get back to a consistent posting groove. I hope you will stick with me in this new year of recipes and life!
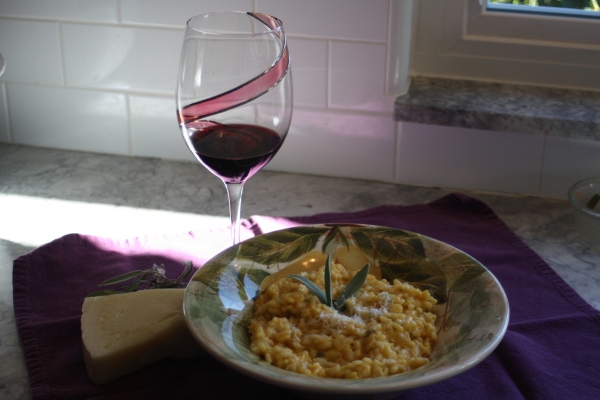
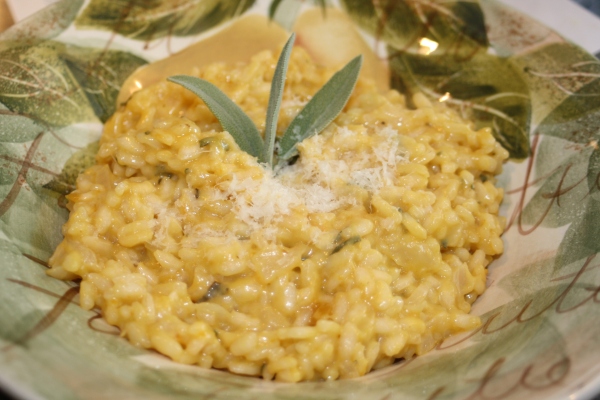
So, to kick off the year, let’s start big! As you know, I love risotto! It is one of my favorite cold-weather comfort foods and so versatile because you can throw almost anything into risotto. I’m always looking for new ideas of how to make risotto different and delicious; my most recent inspiration came from a surprising place. A week before Christmas, I was on the treadmill at the gym, trying to run the work-stress out of my body, and one of the gym staff members changed the channel of the TV hanging in front of my treadmill. Normally, they have the news and Sports Center on all the TVs. (I actually don’t mind watching basketball or baseball games on TV when I’m treadmilling it. It’s a good motivator to keep going.) But, this guy changed it to the Nate Berkus show. I’d never even heard of the show, but it caught my attention because I recognized his guest…Michael Chiarello. Will and I love Michael Chiarello’s restaurant Bottega in Yountville and his former restaurant Tra Vigne in St. Helena. So, of course, I was hooked! Michael was showing Nate Berkus and the audience how to make a dip that Will and I have been trying to figure out how to make for months (look for more on that in a later post!), but then he turned to making butternut squash risotto. Oh my goodness! I was ready to leave the gym early and go home to make it right away. However, I did finish my workout. And, we ended up making the butternut squash risotto with my family a week later. The butternut squash is full of flavor and surprisingly light, enhanced by its combination with the fontina cheese and sage in the risotto. It does take a little bit of time to make this, as you need to prepare the butternut squash prior to starting the risotto, but it’s well worth your time. For the roasted squash, I actually halved the recipe for the seasoning mixture, as the first time we made this, the mixture on top became scorched and we scraped it off. The halved version turned out perfectly though. My altered version is below. Everyone loved this dish, and I will definitely be making this recipe regularly during the fall and winter. I hope you enjoy it as much as we do!
Butternut Squash and Fontina Val d’Aosta Risotto
Adapted from Michael Chiarello
Ingredients:
Roasted Squash
2 cups 1-inch cubes butternut squash (from a 4-pound squash)
1/4 cup (1/2 stick) unsalted butter
1 Tablespoon finely shredded fresh sage, or 1 Tablespoon minced garlic
2 Tablespoons balsamic vinegar
1 Tablespoon brown sugar
Sea salt, preferably gray salt, and freshly ground black pepper
Risotto
About 6 cups chicken stock
3 Tablespoons extra-virgin olive oil
1 cup finely chopped yellow onion
2 cups Arborio rice
1 Tablespoon minced garlic
1 cup dry white wine
1 Tablespoon finely shredded fresh sage
3 cups shredded fontina cheese (not packed)
About 1/4 cup freshly grated Parmesan cheese
Directions:
For the squash: Preheat the oven to 350F. Line a baking sheet with aluminum foil. Put the squash chunks into a large bowl.
Heat a large sauté pan or skillet over medium-high heat and melt the butter until it foams and begins to brown. Add the sage (or the garlic, one or the other but not both), followed by the vinegar and brown sugar. Stand back, as the mixture may spatter. Season with salt and pepper and simmer for 1 to 2 minutes to meld the flavors, stirring gently to dissolve the sugar. Pour the mixture over the squash and toss well.
Arrange the squash on the prepared pan, cover with aluminum foil, and bake until very tender and caramelized, about 40 minutes. Remove the foil and increase the oven temperature to 425ºF for 5 minutes to caramelize the squash further. Remove from the oven and baste the squash with the liquid in the pan. Let cool briefly, then puree in a food processor until creamy. For the risotto: In a medium saucepan, bring the stock to a boil over high heat. Reduce the heat to low and keep it at the barest simmer while you make the risotto.
For the risotto: Heat a large sauté pan or heavy medium saucepan over medium heat, add the olive oil, and cook the onion until soft, about 10 minutes. Add the rice and the minced garlic and cook, stirring frequently, until the rice is pearly white with a translucent outer layer. Add the wine and cook, stirring, until very little liquid is left in the pan. Ladle in 1 cup of the hot stock. Reduce the heat to medium-low, keep the rice at a gentle simmer, while stirring frequently, until almost all the liquid is gone. Ladle in 1/2 cup of the hot stock and repeat, ladling in 1/2 cup of stock each time most of the liquid has been absorbed. All together, counting from the first cup of stock, you’ll stir and cook for about 18 to 25 minutes. Taste the rice to decide when it’s done: it should be creamy, firm in the center but without any hint of crunch. Stir in the butternut mixture, remove from the heat, and stir in the shredded sage and the fontina. Serve and enjoy!
Spinach, Potato, Bacon & Goat Cheese Frittata
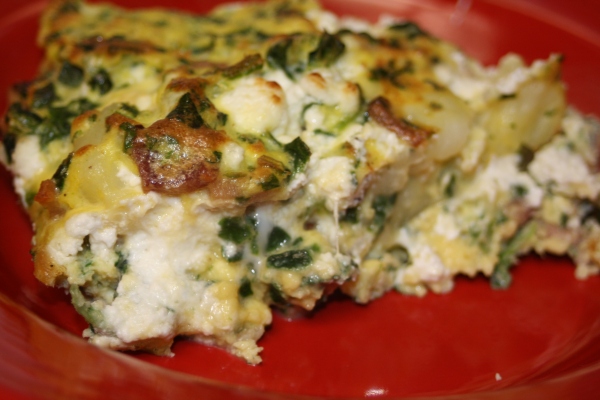
Several months ago, a friend of mine brought a delicious frittata to a Bible study potluck. It was the first dish on the table to be completely eaten and gone, even before everyone had gotten a first serving! I came home raving about this wonderfully savory frittata to Will, at which point he insisted we make it. A few days later, I attempted to recreate her delicious dish for dinner (who says you can’t have frittata for breakfast and dinner?!). The flavor was good, just as I remembered, however, I don’t own a nonstick pan, and I think a nonstick pan is one of the key factors in making this dish really work. Otherwise, you end up with a stuck mess on the bottom of your pan, like I did! A frittata is a very versatile dish, in that you can serve it warm out of the oven, or at room temperature. Either way, get ready for it to disappear quickly!
Spinach, Potato, Bacon, & Goat Cheese Frittata
Ingredients:
4 cups fresh spinach
1 lb. red potatoes, diced in 1/2-inch pieces
7 slices bacon, cut into bite-sized pieces
10 eggs
3 Tablespoons half and half (you could also use milk)
1/4 teaspoon salt
1/4 teaspoon pepper
1/2 cup goat cheese, crumbled
Directions:
Adjust oven rack to top of oven and set to broil.
Place spinach in saute pan over medium high heat, cooking until wilted. Take off heat and allow to cool, squeezing out excess liquid. Cook potatoes in microwave, then dice into bite-sized piece. Cook bacon until crispy, and cut into bite-sized pieces.
Whisk eggs, half and half, 1/4 teaspoon salt, and 1/4 teaspoon pepper together in bowl until combined. Add spinach, potato, and bacon to egg mixture, mixing thoroughly. Melt butter in a saute pan (preferably nonstick) over medium heat. Once butter begins to foam, pour egg mixture into pan. Drop 1/2 cup of goat cheese evenly into the egg mixture in the pan. Turn heat down to low. When the eggs have set and thickened, and only the surface is runny, run the skillet under the broiler for a minute or two, or as soon as the frittata “sets.”
Note: A frittata can also be cooked completely in the oven. Place egg mixture into a round, buttered baking dish. Bake in oven heated to 350 degrees for 15 minutes, or until frittata is no longer runny.
Serve and enjoy!
Flavorful Fridays: Tomatoes, Basil, & Mozzarella Salad
September is a great month. Aside from celebrating Will’s birthday, it’s a great time for produce where we live. Because the days are still warm and beautiful, we have heirloom tomatoes and basil that are still ripe and fresh at the farmers’ market.
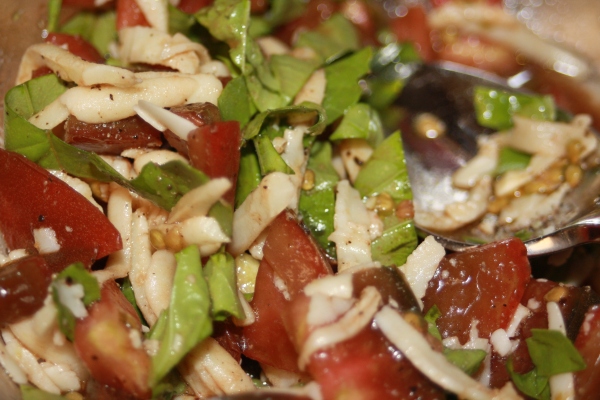
A few weeks ago, I needed to use up a tomato and some last few leaves of basil before my visit to the farmers’ market the following day. I had a little wedge of mozzarella left over from making pizza earlier in the week, and I decided to make a tomato, basil, and mozzarella salad. It’s super easy and quick to make, and it tastes so fresh, reminiscent of the early days of summer. I drizzled a little olive oil and balsamic vinegar on top for extra flavor, not that these ingredients needed it. I hope you give this salad a try and enjoy those last few weeks of warm, summer weather!
Tomatoes, Basil, & Mozzarella Salad
2 large heirloom tomatoes, diced
1 cup basil, julienned
1 cup mozzarella, grated
1 Tablespoon olive oil
1 Tablespoon balsamic vinegar
Pinch of salt and pepper to taste.
Directions:
Dice tomatoes and place in salad bowl. Julienne basil leaves and add to bowl. Grate mozzarella cheese and add to tomatoes and basil in bowl. Drizzle olive oil and balsamic vinegar on top, adding salt and pepper to taste. Toss, serve, and enjoy!
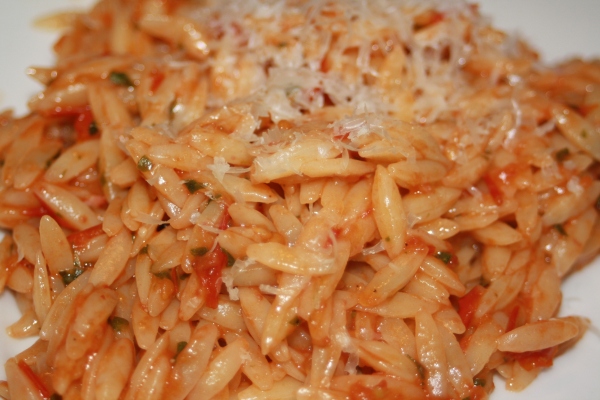
Flavorful Fridays: Orzo with Tomato Vinaigrette
Last month, for various reasons, I found myself in a dinner rut–essentially I was making almost the same dinners every week. In an effort to climb out of my rut, I pulled up some recorded episodes of Giada at Home for inspiration. Sure enough, Giada did not disappoint. Out of the three episodes I watched with Monica, we compiled a list of six delectable dishes that we have to try. This week, I made Giada’s Orzo with Tomato Vinaigrette. She uses smoked salt, but I didn’t want to go the store to purchase it, so I substituted the smoked salt for coarse sea salt.
This orzo pasta is extremely light and fresh. It can be served either hot or cold, and just as easily be a side dish or the main course. And, the main ingredients are tomatoes and basil, what else do you need? I hope you enjoy this pasta dish as much as we do.
Orzo with Tomato Vinaigrette
Adapted from Giada De Laurentiis
Ingredients:
1 pound cherry tomatoes
1 pound orzo pasta
Vinaigrette:
1/2 cup packed fresh basil leaves, torn
2 Tablespoons apple cider vinegar
2 Tablespoons olive oil
1 Tablespoon honey
1 Tablespoon salt (Giada used smoked salt, but regular works as well)
1/4 teaspoon freshly ground black pepper
1/3 cup grated Parmesan
Directions:
Place the tomatoes in a large skillet over medium-high heat. Cook, shaking the pan occasionally, until the tomatoes are tender and the skins are charred in spots, about 15 minutes. Set aside to cool.
Bring a large pot of salted water to a boil over high heat. Add the pasta and cook until tender but still firm to the bite, stirring occasionally, 8 to 10 minutes. Drain and place in a large serving bowl.
For the vinaigrette: Place the tomatoes, basil, vinegar, olive oil, honey, salt, and pepper in a blender. Blend until smooth.
Pour the vinaigrette over the pasta and toss until coated. Sprinkle with grated Parmesan cheese. Season with salt and pepper, to taste. Serve and enjoy!
